

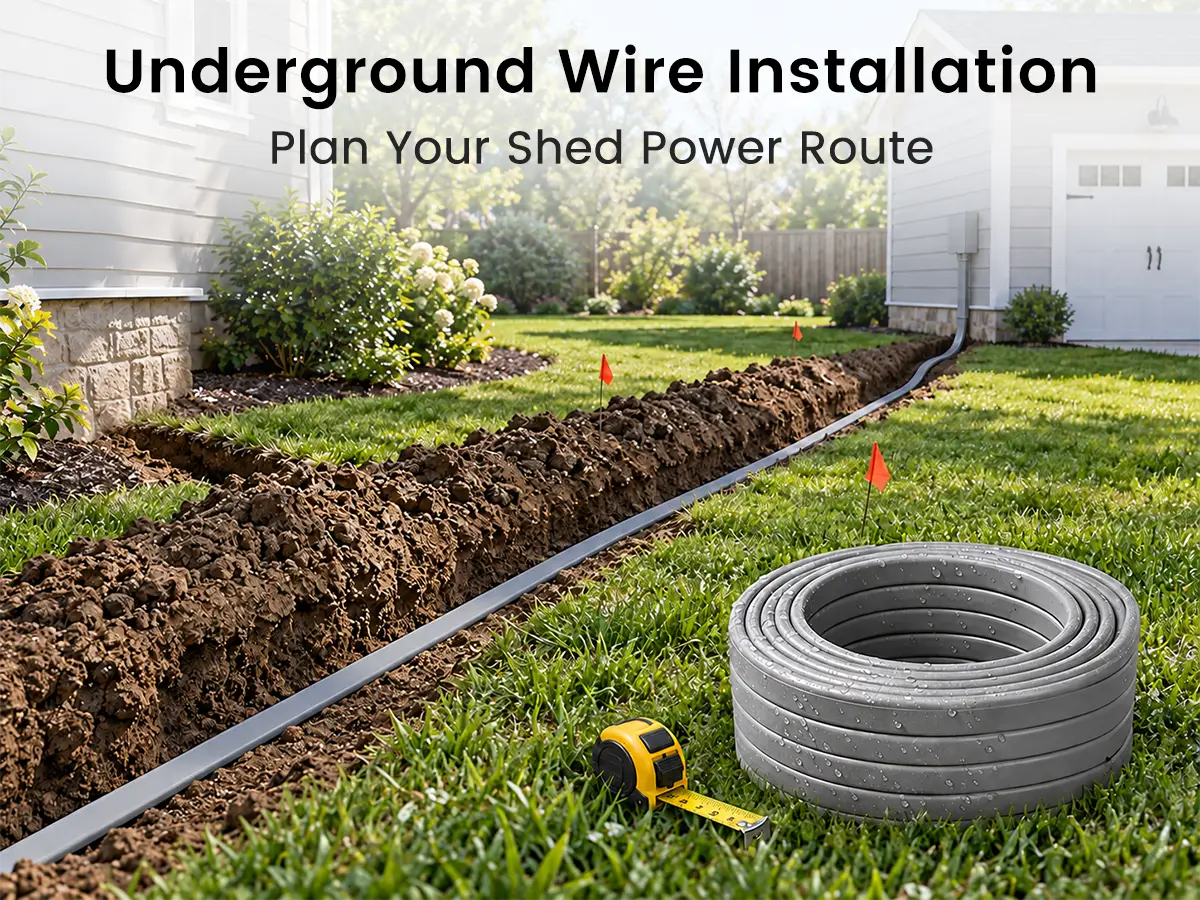
Installing underground electrical wire for a shed or detached garage starts with more than digging a trench. You need to identify the power source, plan the route, locate existing utilities, use an approved wiring method, and protect the cable where it enters and leaves the ground.
This guide explains how to run underground electrical wire from an existing building to a shed or detached garage, including trench preparation, UF-B cable installation, ground-to-wall transitions, concrete crossings, building entry, inspection, and backfilling. If your main question is which wire size or conductor configuration to buy, that is a separate decision based on load, distance, and installation conditions.
Shop Electrical Wire
Direct-burial wire for sheds, garages and outdoor projects.
What Type of Underground Electrical Wire Can You Bury?
Only wiring approved for underground use should be buried. UF-B is one common cable type designed for permitted underground and direct-burial applications, which means the cable can be placed in the soil without a conduit around it when the installation rules allow it. The jacket is built to resist moisture and soil conditions, which is the main difference from the cable used inside walls.
Putting an indoor cable inside a conduit does not turn it into a direct-burial cable. A conduit can hold water, and a cable that is not rated for wet locations can degrade inside it. The cable type and the wiring method both have to be approved for the location. This guide uses UF-B as the installation example. For a closer look at where UF-B fits among outdoor wiring types, see where each wire type belongs.
What Should You Check Before Installing Underground Electrical Wire?
Planning decides most of what happens in the trench. Three checks come before any digging: where the power comes from, where the route goes, and what is already buried along it.
Where Will the Underground Electrical Wire Get Power?
Plan the supply from an electrical panel or another code-permitted source. Do not assume an existing outlet or lighting circuit can supply a detached building; circuit capacity, planned loads, and local requirements must be checked first. For example, the starting point can be the house main panel or a subpanel in a garage that is already fed from the house.
If the shed or garage already has power, check which panel feeds it and whether that circuit is dedicated before adding another cable. An electrician should confirm panel capacity, disconnect requirements, and permits.
How Should You Plan and Mark the Underground Wire Route?
Plan the whole route before excavation, including both ground transitions and every hard surface or obstacle the cable will cross. The route runs from the electrical panel to a building exit, through a protected above-ground section, into the trench, up through a second protected transition, and into the shed or garage.
Walk the route and check for driveways, sidewalks, landscaping, retaining walls, trees, fences, existing structures, drainage paths, and any property line or easement restrictions. Decide how each obstacle will be handled before the main trench is dug, because a concrete slab found halfway through a dig is much harder to solve than one found on a walk-through.
Once the route is settled, mark it on the ground: the building exit, the trench line, any concrete crossing, the point where the cable rises at the shed or garage, and the building entry. The next section covers the utility marks you need to add.
Call 811 Before Digging
Call 811 before digging so participating utility companies can mark underground utility lines. The official 811 resource explains how to submit a request for your area.
Two points are easy to miss. The 811 service does not locate every private utility line, so a private water line, irrigation line, or an earlier electrical run on your property may need a separate locating service. A short trench is not a reason to skip the call either. Once the marks are on the ground, adjust your own route markings so the trench stays clear of them.
How Do You Install Underground Electrical Wire to a Shed or Detached Garage?
The installation follows five steps, from the trench to the backfill.
Step 1: Dig the Trench to the Required Burial Depth
For the standard UF-B direct-burial case in a general yard, the table below shows 24 inches of cover. Circuit conditions, surface use, and local amendments can change the required depth.
| Wiring Method and Location | Minimum Cover |
|---|---|
| Direct-burial cable (UF-B), yard or general location | 24 in |
| Nonmetallic conduit (PVC) | 18 in |
| Rigid or intermediate metal conduit | 6 in |
| The three wiring methods above under a one- or two-family dwelling driveway or outdoor parking area used only for dwelling purposes | 18 in |
These values come from the minimum cover table in the International Residential Code and NFPA 70 (NEC). Local jurisdictions may adopt a different code edition or add requirements, so confirm the depth with your local building authority before you dig.
Step 2: Lay the UF-B Cable in the Trench
Place the UF-B cable along the prepared route without damaging its outer jacket, and leave enough cable at both ends for the planned connections. Clear sharp stones from the trench bottom, do not drag the cable across rough ground, and avoid forcing tight bends. Follow the cable manufacturer’s installation instructions for bend radius and handling.
Shop the 250 ft 10/2 UF-B wire for $20 off during Vantecable’s Fall Backyard Wire Refresh.

Vantecable 10/2 UF-B Direct Burial Wire
Pure copper with ground for sheds, garages and outdoor circuits.
10/2 AWG with ground · 600V · Direct burial · UL Listed · 50–250 ft
From $72.99
Shop the UF-B WireStep 3: Protect the UF-B Cable Where It Comes Above Ground
Protect the cable at three points: where it leaves the ground at the house or garage wall, where it rises out of the ground at the shed or garage, and along the wall up to the building entry. Use a raceway or enclosure over the exposed section at each point. The sequence is underground UF-B, ground transition, protective raceway, wall, building entry.
NEC 300.5(D) requires protection for direct-buried cable emerging from grade to extend from the required cover depth—without requiring more than 18 inches below grade—to at least 8 feet above grade. Conductors entering a building must remain protected to the point of entrance. A direct-burial rating does not remove the requirement for physical protection where the cable emerges from grade. Above grade, the cable is exposed to lawn equipment, foot traffic, and soil settling at the transition. The raceway type depends on the location and the code your jurisdiction has adopted, so confirm it with your inspector. For the same protection steps on a low-voltage run, see our direct burial installation guide.
Step 4: Bring the Wire Into the Shed and Complete the Connections
Route the protected cable through the planned building entry point and into the appropriate electrical enclosure or equipment. The wall penetration, raceway, and fittings should keep the protection continuous and keep moisture out of the building.
Complete the panel and equipment connections according to the applicable electrical code, the equipment instructions, and local inspection requirements. The final connection at the main panel, along with any disconnect requirement at the outbuilding, is work to have a licensed electrician or your local authority confirm. This guide does not cover breaker wiring, because those details depend on the equipment and the local rules.
Step 5: Inspect and Backfill the Trench
Complete any required inspection before covering the trench. The inspector, or you if no inspection is required, should check the cable condition, the burial cover, the ground transition protection, the building entry, and the raceway at each end.
After the installation has been inspected or cleared for backfilling, cover the cable carefully with suitable material that will not damage the cable or raceway. Sharp rock and construction debris should stay out of the first layer of fill. Depending on local requirements, warning tape or other protective material may be needed above the cable.
How Do You Run Underground Electrical Wire Under a Concrete Driveway or Sidewalk?
If underground electrical wire needs to cross a driveway or sidewalk, you generally have three options: reroute around the concrete, open a section of the surface, or create a passage beneath it. The best method depends on the site, the wiring method, and local requirements.
Rerouting is usually the simplest choice. If the driveway has a grass edge or the sidewalk leaves room to go around, a longer trench avoids cutting or boring through the hard surface entirely. This works when the detour does not add much length and does not conflict with other utilities or obstacles.
When going around is not possible, a passage can sometimes be created beneath an existing sidewalk or driveway without removing the whole surface. The passage is connected to the trench on both sides, and the cable or raceway is placed through it. The exact boring or tunneling method depends on the soil, the surface, the wiring method, and local requirements.
For the three wiring methods listed in Step 1, the table shows 18 inches of cover under a one- or two-family dwelling driveway used only for dwelling-related purposes. Confirm the locally adopted requirement before creating the crossing.
| Option | Works Best When | Main Limit |
|---|---|---|
| Reroute around | There is open ground beside the concrete | Adds trench length |
| Open the surface | The slab is thin or already being replaced | Requires cutting and repair |
| Pass beneath | The concrete is intact and cannot be avoided | Needs a tunnel or boring method suited to the soil |
Why Can Underground Electrical Wire Have Voltage Drop?
Voltage drop on an underground run comes from distance, electrical load, conductor material, and connections. The longer the run and the heavier the load, the lower the voltage at the shed. Choose wire size and circuit configuration before buying cable, based on the actual load and distance.
Underground Electrical Wire FAQs
How Long Does Underground Electrical Wire Last?
Properly installed underground wire can last many years, but no lifespan applies to every installation. Moisture, soil conditions, physical damage, and connection quality all affect it. If an older run shows damaged insulation, unexplained voltage problems, or repeated faults, have it evaluated instead of relying on an assumed service life.
Can You Splice Underground Electrical Wire?
Yes, if the splice is made with a connector or kit listed for direct burial. Ordinary wire nuts and electrical tape do not qualify. Where practical, run one continuous length of cable so no splice is needed.
Can You Bury an Outdoor Extension Cord?
No. Even an outdoor-rated extension cord is intended for temporary power, not direct burial or permanent wiring. To supply a shed or detached garage permanently, use an approved underground wiring method that matches the installation and local requirements.
Conclusion
Installing underground electrical wire to a shed or detached garage is mainly about planning the route correctly and protecting the cable at every transition. The core actions are to identify the electrical source, locate existing utilities, confirm burial requirements, install and protect the UF-B cable, and inspect before backfilling.
For permitted direct-burial applications, Vantecable’s 10/2 UF-B Wire is one option to consider when its specifications match the project requirements. If you need to determine the appropriate wire size or conductor configuration, evaluate the electrical load, distance, and installation conditions before purchasing cable.
Shop the 250 ft 10/2 UF-B wire for $20 off during Vantecable’s Fall Backyard Wire Refresh.
Safety note: Underground wiring methods, burial depths, and inspection requirements vary by jurisdiction. Confirm the locally adopted code edition with your local building authority, and have panel connections made or inspected by a licensed electrician where required.